Hello everyone, toady in this article I will explain to you about
making job scheduling in SQL server, which means you can create any type
of job in SQL server and then run it automatically at your scheduled
time intervals as per your requirement; here I will make a job which
will run after every hour and it will export the SQL server table data
to the MS Excel file. So here I will use the SSIS package for exporting
data to Excel which we made in our previous article (Here).
For creating the Job in SQL server follow the below steps. (Here I use SQL server 2008.)
Start the SQL server 2008, and for creating the JOB we need to start the SQL server Agent service in SQL server. So first we check if the SQL server Agent service is running on my machine or not.

For checking the SQL server Agent service we go to object explorer in SQL server management studio and check the color of SQL server. If agent is red then agent is currently stopped, so start it by right click on it, and also you can start it from service page as shown in the below image. Go to Command prompt and type “Services.msc“ and hit Enter, it will open the Service window, now find the SQL server Agent service and start it.

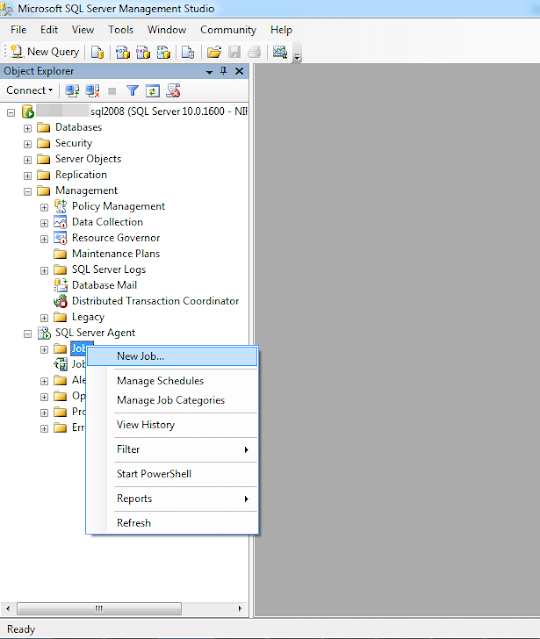
Now Expand the SQL server Agent from the object explorer in SQL Server as shown in the below image and right click on “Jobs” and click on “New Job…” .
A New Job window is opened in “General” Option; give any proper valid name to your Job. And also you can write description about your job.

Now go to next Tab “Steps;” in this tab you have to specify what you want to execute when this job is run, so click on new button , and it will open new window; name it “New Job Steps“.

Now give the proper name to Steps in “Step Name“ field. And then got to option Type in which you have which type of job you want, here in the dropdown list there are many options available.
Active X Script
Operating System
PowerShell
Replication Distributor
Replication Merge
Replication Queue Reader
Replication Snapshot
Replication Transaction Log Reader
SQL Sever Analysis Services Command
SQL Sever Analysis Services Query
SQL Sever Analysis Services Package
Here you can select any of then as per your requirement. Here I selected 11th (SQL Server Analysis Services Package) option and continued my work.
Now in the next option select the Package source file Type, so here you have multiple options, if you have package tin in your local file system the you can select it and if your package is stored in SQL server then select this option, here I will continue by selecting the “SQL Server”
Now in next option “Server:” select your server name on which your package is stored.
Than select your authentication mode either windows or SQL server authentication.
In next option (Package) browse your packages and select them. And then finally close this window by clicking on “Ok” button.
Here you can add multiple steps also and also arrange its execution sequence one by one. Finally click on Ok button and close the window.

Now in new tab “Schedules”. You can schedule the time on which you have to run this job. So click on new button it will open new window (New Schedule window).
In “New Schedule window” we set schedule for job to run every hour so select parameter as shown below.
Name: Schedule 1
Schedule Type: Recurring
Enable: Mark
In frequency Tab
Occurs: Daily
Recurs Every: 1 day
Daily Frequency
Occurs every: 1 hour

Now next in Tab “Alert” you can set the alert message when job executes successfully or generates errors then it will display some alert message to user.

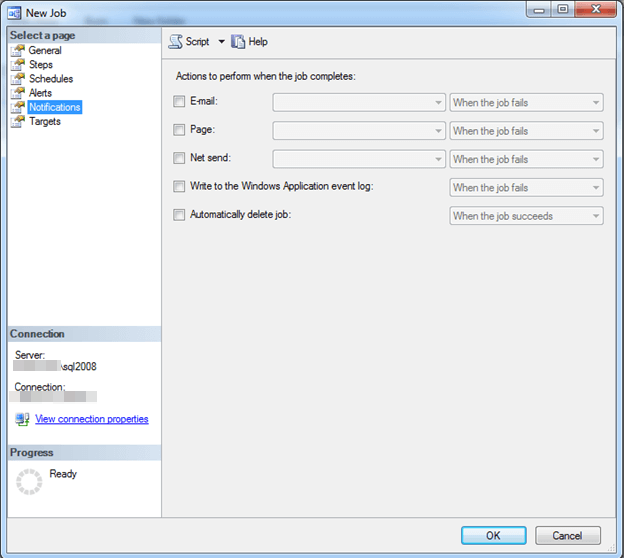
Now move to next tab “Notifications;” you can send the notification, which means when your job is executed the job status is sent to user either it successfully executes or any error occurs. You can get alert by email or also generate log file.
Now move to next tab “Targets;” here you have to select the server on which your job is executed. Now close this window by clicking on OK button.

Your job is ready to use, as show in the below image you can see “Job1”.

Thank for reading my article if you have any query regarding this article then you can ask in the comment section.
Best SQL 2019 Hosting Recommendation


0 comments:
Post a Comment